Thursday, April 26, 2012

Thursday Tidbit - Checking Your 1/4" Seam

All quilting patterns are written to be sewn using a 1/4" seam allowance.  Most machines have a 1/4" foot that can be purchased for them.  But, not all 1/4" feet are created equal. If you are having difficulties making all your piecing line up, you should double-check the accuracy of your foot.  Most of the troubleshooting we do in the shop for customers regarding patchwork issues has to do with an inaccurate 1/4" seam.

We have a little tool that will help you with that.  It's the Perkins Perfect Piecing Seam Guide.


Here's what the actual guide looks like.
See that little hole in the middle of the etched line at the bottom?  That's for the placement of your needle.

Slip the guide under your foot and gently lower your needle into the hole.  Make sure the guide is straight and lower your foot onto the guide.
The right edge of your 1/4" foot should be flush with the right edge of the tool.  If it's not, your seaming is going to be off, and you will have much greater difficulty getting your patchwork seams and points to match up.  You can be cutting everything out accurately, but if your seam is not at 1/4", your blocks will not come out the right size.  Being off by as little as 1/32nd of an inch per seam can make your entire quilt top shorter or long by INCHES once you multiply all your seams in the quilt top.  Piecing with an accurate 1/4" seam will make your quilting life so much more enjoyable!

So, what if your foot doesn't line up with your seam guide?  If you have the ability to move your needle position, do so until everything lines up.  WRITE DOWN THIS CHANGE SO THAT YOU DON'T FORGET!  (Yes, I'm yelling.  It's that important).  If you can't change the needle position, you can make your own "jig" for your 1/4" seam.  You can purchase adhesive-backed moleskin in the foot care department of your pharmacy and cut a piece off and place it next to the seam guide.  When the seam guide is removed, you will have a little "fence" to place your patches up next to.  Or, in a pinch, you can grab a stack of post-it notes and do the same thing.  You want to position your "jig" as close to the foot as you can, making sure not to touch the feed dogs on the throatplate of your machine.
The post-its are not as sticky as the moleskin, and they will move over time.  But they work in a pinch.  If you are new to quilting, and your 1/4" foot is accurate but you are still having trouble sewing straight and staying consistent with your seam allowances, you can also use the moleskin or post-it note jig as "training wheels" until you feel confident using just the foot by itself.

After you have checked your foot, now it's time to check your real seam allowances.  Cut (3) pieces of fabric 1-1/2" wide.  I cut mine 1-1/2" x 3-1/2".

Sew the 3 pieces together to create a mini rail fence block.  Press the seams open or to the side and measure the width of the block.  It should measure 3-1/2" wide.  If it doesn't, re-check your foot, measure your actual seams, review your pressing and try again.

By ensuring that you are piecing with an accurate 1/4" seam, you are well on your way to perfect patchwork!

Monday, April 23, 2012

One Week, One Thing - April 23

We've completed our 16th week of 2012, and I am proud of myself for actually keeping up with these posts!

This past week was slow going because there was a good bit of handwork involved.  I am working on the sample for our next BOM - Vintage Rouge

This past week's progress:

1.  I cut out all the blocks for the center of the quilt.  I handed out 3 of the installments to friends for sewing help.  Those blocks have all been returned to me, ready to piece into the quilt.

2.  I English Paper Pieced the large Dresden Plate for the center of the quilt.

It still needs to be appliqued onto the center block.


3.  I completed 3 of the 4 small Dresden Plate blocks for the body of the quilt.  The 4th will be done this week.


The beauty of these Dresden Plates (as well as other blocks you will see later) is that they utilize a PRINTED STRIPE for design effect!  Each of the blades of the dresdens appear to have a seam of red/white fabrics down the middle of it.  Nope!  It's the stripe!  Each blade is a single piece of fabric!  This stripe is also used in the quilt to create faux half square triangles.  Looks hard - sews easy!

What happens when you're trying to sew and your cat decides that he must be petted RIGHT NOW?
You get a face full of Willie!  You gotta love our furry friends....even if they make progress go much slower!

This week, I intend to finish the Dresdens and sew the center of the quilt together.  Then I'll get to tackle those appliqued borders!

So, what did you do this week?  Trae - I expect a full report!

Thursday, April 19, 2012

Thursday Tidbit - Grainlines

Here's some basic info for you.

Fabric is woven with fibers, and the direction of the fibers is called the "grainline".
  • The fibers that run parallel to the selvage are the "weft", or quilters call it the Length of Grain.  These are the strongest fibers in the material, and they have little to no stretch or give.
  • The fibers that run from selvage to selvage are the "warp", or Cross Grain.  These are the weakest fibers in the material, and they have a small amount of stretch or give.
  • A diagonal cut across the warp & the weft is called Bias, and it has the most stretch of all.

Why should you care?
1.  Marti Michell is a self-described "grainline geek".  Since the length of grain has little to no stretch, she cuts all of her pieces on length of grain so that her project is guaranteed to be nice and flat.  If you cut your borders on the length of grain, you won't have to seam them for length.  Con:  Since there is no give, your piecing needs to be deadly accurate.  There's no "easing" allowed.  Using length of grain for piecing and borders also requires that you purchase more fabric.
2.  Pieces cut cross grain have a little bit of stretch.  If your piecing tends not to be 100% accurate, you can "ease" blocks to sashing and borders.  You will require less fabric if you cut all your pieces cross grain, but any sash or border longer than 42" will have to be seamed.
3.  Bias is extremely flexible, and is required if you have curves or other attributes that require the fabric to bend.  Of course, the diagonal seam in a half square is on the bias.  This is why you need to use caution when ironing half squares or any other piecing that has an angle in it (like flying geese).  "Ironing" instead of "pressing" along a bias-pieced seam can cause distortion in the block.  But cutting on the bias is very handy for applique or for binding a quilt with curved edges.
4.  Tearing fabric is easier if you tear along the length of grain rather than the cross grain.  Think about it; by tearing on the length of grain, you are breaking the weaker (warp) fibers.  You have a minimum of damage or bruising.  This is why I tear my selvages off when piecing my backing. If you tear across the grain (from selvage to selvage), you are attempting to break the strongest (weft) fibers, and the resulting damage (or "bruising") to the remaining fabric can equal a half inch or more.  This is why we rotary cut our fabric in the store instead of tearing it.  Some quilt shops still tear fabric from the bolt.  If you ever encounter this, you can ask to have your fabric cut, and if they won't, I suggest that you purchase extra fabric to allow for the "bruising" that will result.

Even if you don't have the selvage on a piece of fabric anymore, you can use the stretch test to determine the grainline of a piece of fabric.  Go ahead, give it a try!

Monday, April 16, 2012

One Week, One Thing - April 16

Good afternoon, my friends!

Last week, I completed the quilting and binding on the Kaffe Fassett Collection 1000 Pyramids quilt.  We had a few kits in the shop, but they have sold out.  It's on our list to re-cut; hopefully we'll get to that this week.

I also played a little bit with the Marti Michell large Drunkard's Path templates this past week.  Don't know if I'll be able to get back to it this week.

My number one challenge this week is to completely cut out the pieces for this quilt....
It's called Vintage Rouge and it's a Block of the Month that we will be starting in June and the sample kit just arrived.  I need to get busy!  The fun thing about this quilt is the dresdens are English Paper Pieced using a striped fabric - it's all an optical illusion!!  Perhaps I'll have actual block progress to show next week.  But I need to get it all cut out first....

How about you?

Thursday, April 12, 2012

Thursday Tidbit - Piecing Your Backing

Congratulations! You've finished a fabulous quilt top and now it's time to piece your backing together.  If you've forgotten how to determine how much yardage you will need, refresh your memory by reading the past Tidbit on calculating yardage.

Most of your backings (unless you are making a queen-sized or larger quilt) will require a single seam in the backing.  Here's the quick way I go about preparing and sewing that seam.

You know you'll have to cut your yardage in half.  Don't try to measure it; just fold it in half and place a pin in the fold.
Open up the yardage, and place a ruler next to the pin, making sure your ruler is aligned straight with the fold.
Remove the pin and cut from the fold to the selvage.  You now have two equal pieces for your backing.

The next step is to sew the two halves together along the long sides.  You'll need to remove the selvages before you begin sewing this seam.  But before you do that, here's something to think about.

If your backing is directional, you'll want to make sure that the two halves are facing the same direction once you sew the seam.  Without wrangling yards of fabric, here's an easy way to make sure that both pieces are oriented the same way.

Have you ever really looked at selvages on fabric?  Usually, one selvage has printed information on it, and the other one doesn't.  If you remove the printed selvage from one half of backing and the plain selvage from the other, you are guaranteed that your print will be in the same direction once your seam is sewn.  Of course, the exception is batiks, woven plaids and solids.  You'll just have to pay attention to your pattern orientation on those.
Once you've determined which selvages you are going to remove, it's time to do that.  Instead of opening up the fabric and folding it multiple times and cutting off the selvage with a rotary cutter and ruler, I TEAR the selvage off.  Yes, I said TEAR.  You can never guarantee that your cut is going to be straight if you make multiple folds in yards of fabric and try to cut it.  Tearing guarantees a straight edge, because you are tearing along the length of grain of the fabric.  I know this sounds scary, but you'll just have to trust me on this.  I've done it hundreds of times!

Make a snip with a pair of scissors parallel to the selvage.
Now pull on the selvage and start tearing!  The fabric will curl slightly after being torn.
Take the fabric to your ironing board and press the edge as well as press out the center fold line.
This is how your edge will look after it's pressed.  You may have just a little bit of "bruising" of the fabric, but not nearly as much as you would if you had torn the fabric cross-grain (from selvage to selvage).

Place your two halves right sides together, and sew them together using a 1/2" seam.  (Note:  If you don't use pins, you will probably end up with one edge being 1/2" longer than the other when you get to the end of the seam.  Don't panic - it's okay because you added extra to the length or width when you calculated your yardage amount.  This just emphasizes the fact that fabric feeds at different rates through the feeds dogs.  This is why you NEVER should sew on borders without pinning!) Press the seam open and you're good to go!

If you are piecing a back with 3 seams, you will have to measure your yardage into thirds before you cut it.  Work with the selvages the same way; remove the selvages from piece 1 and piece 2 and seam together.  Press the seam.  Now, remove the selvages from the other side of piece 2 and piece 3 and seam together.  By doing the sewing in steps, you'll guarantee that the print on all 3 panels is oriented in the same direction.

Monday, April 9, 2012

One Week, One Thing - April 9

Hello, my friends!  I really only got 1 thing accomplished this past week, but it's a big thing!
This will be a new kit coming to TQA in the near future.  It's called 1000 Pyramids (actually, 682 pyramids) - all the triangles are die cut from Kaffe Collective fabrics.  With die cut triangles and and side setting triangles, this top sews together like a breeze!  It's hard to tell in the photo, but the setting triangles and border are a black and white pindot.  It sets off the vibrant colors of the triangles and allows them to shine!

My goal for this coming week is to get this bad boy quilted and bound.  I already made the binding, so that's one step already finished!

What did you do last week, and what are you hoping to do this week?

Monday, April 2, 2012

One Week, One Thing - April 2

Happy Monday, everybody!

I didn't get to sew much this past week - my daughter brought a nasty stomach virus home with her as a souvenir from New York City, so I spent much of my time tending to her.

But I did get my EPP Hexagon top quilted and bound!
Here's a reminder to all you EPP piecers out there....double check that you have removed ALL the papers before you quilt your top.  Don't ask me how I know!  :)  There's a slightly crunchy surprise near one of the edges that I noticed as I was binding it....

This week I hope to be working on a store sample of a 1000 Pyramids quilt kit using Kaffe Collective fabrics.  Here's my triangles sewn into the first round of pairs waiting to be pressed.
I'm hoping to get the top pieced this coming week, but I may be spending time helping the girl with her AP art projects instead.  She's a little bit behind from her band trip and then being so sick.

Oh well, a mom's gotta do what a mom's gotta do!  Til next week!

Sunday, April 1, 2012

Thursday Tidbit - Using the Angler 2

I am currently working on a sample for the store using this pattern
and this fabric.
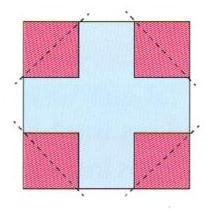
The basic block calls for what I call "connector corners" or "flip and sew corners" - where you lay a square across a block and sew the diagonal, trim the corner, and flip the remaining triangle up...like this.
There are 42 blocks in this quilt (using the entire layer cake), and each block calls for 8 connector corners.  The pattern says to draw a diagonal sewing line across each square.  I quickly did the math...  42 blocks times 8 corners equals 336 lines!  I don't know about you, but that would take me a lot of time!  I much rather be sewing than marking lines!

The Angler 2 Tool to my rescue!!

This handy-dandy plastic template sits over the throatplate of your sewing machine and you can use the lines on the tool as a fabric guide instead of actually marking lines.  Here's how it works.

Inside the package is a plastic template.  The template is made up of a "key" and its surround.
You have to cut the "key" away from the surround on the dotted lines as instructed.  Here's a closeup of the "key".
See that little circle that says "Punch needle hole here"?  Place the key under your presser foot, and lower the needle directly into that hole.

Make sure your "key" template is sitting straight on the throatplate and lower the presser foot to hold it in place, making sure the needle is still in the down position in the hole.

Now, take the template "surround" that you cut away from the "key" and place it on the bed of your machine, snugging it right up to the cut lines of the "key" template.
Tape the "surround" to the bed of your machine.  I would usually use painter's or masking tape for this, but I have a teenager in the house who "borrows" things and all I could find was scotch tape!  Can you see how the lines of the "surround" completely match up to the lines on the "key"? 

After the "surround" template is secured to your machine, raise the presser foot and the needle and remove the "key" template.
Place the "key" template back in the package!  You must make sure not to lose this piece!  You will need it every time that you attach the Angler to your machine!  In fact, I put all of the parts into a larger ziploc bag so that nothing gets misplaced.

Now you are ready to sew those pesky diagonal lines!

Place your square on the corner of the fabric or block that you are attaching it to, matching up corners and sides.  You can pin the square in place if you wish.  Place the square in front of the needle, matching the top corner with the needle line, and the bottom corner with the center line on the tool.
Begin sewing, keeping the bottom corner lined up with the center line on the template.
Continue sewing across the square, and "eyeball" the last bit to the corner once your square moves off the template.
You can chain piece as many corners as you need to.  Just pick up the next one, line it up in front of the needle, align the bottom corner with the template line, and sew!
It's that easy!  Nice, straight diagonal lines with no marking!

If you look closely at the template, there are lines 1/4" on either side of the center line.  You can use these lines if you are making half squares and sewing on both sides of diagonal.

The tool comes with complete printed directions.  It's a life saver for this type of task!

The quilt is all finished now - isn't it cute?  You can get one for yourself here.