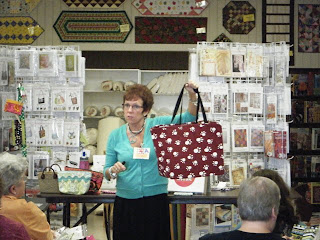
The Quilt Asylum is proudly participating in the One Million Pillowcase Challenge sponsored by American Patchwork and Quilting. We are collecting pillowcases through the end of the year benefitting The Samaritan Inn - Collin County's only homeless shelter.
Pillowcases are a great way to clean out your stash, teach a novice seamstress how to sew, or coordinate your bedroom linens with your quilts. Our "Hot Dog" pillowcase method will have you making professional looking pillowcases with no raw edges in only 3 seams!
Materials Required:
3/4 yd focus fabric for body of pillowcase
1/8 yd (cut to 2" x WOF) for optional accent trim
1/4 yd fabric for cuff
If you are adding the optional accent trim, cut a 2" x WOF strip and press in half with wrong sides together.
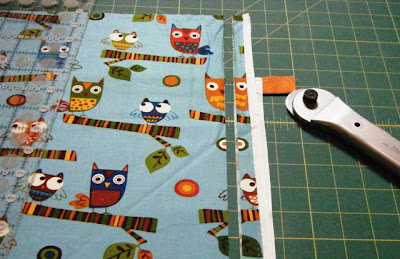
On your table, layer your cuff fabric face up [this is the "bun"], the optional trim strip with the raw edges toward the top, and your pillowcase fabric face down. If you are using a directional print, make sure you pin the BOTTOM of the fabric. The left side of this photo shows the layers in the proper order. The right side shows all the layers even and pinned along the top edge. Don't worry about the selvedges. We'll take care of that later. Just line up everything even on the left side and let the right side be uneven.
Roll or fold up the pillowcase body fabric [this is the hot dog], stopping just below the pin points along the top edge, leaving the cuff fabric flat on the table.
Bring the lower edge of the cuff fabric up to the pinned edge and pin all 4 layers together (cuff, trim, body, cuff), making sure that your "hot dog" is out of the way of the pinned seam.
This is what your rolled up and pinned "hot dog" should look like. Take your "hot dog" to your machine and sew the raw edge with a 1/4" seam.
Once you have sewn your cuff/trim/body seam, you'll need to turn it right side out. Pull the cuff fabric with your left hand while pulling out the body fabric with your right hand. Once everything is right side out, you will have a completely enclosed cuff seam.
Press the cuff flat with your iron, keeping the trim pointed towards the body of the pillowcase.
If you chose to include the optional trim piece, and you want to topstitch it down - now is the time.
Now you need to clean up the selvedge edges. On your cutting mat, fold your pillowcase in half matching the raw edge of the pillowcase body to the folded edge of the cuff. Cut the selvedges off both sides.
It's time to sew the first part of a French seam. This will encase the raw edges of your pillowcase. Fold your pillowcase in half lenthwise [wrong sides together}, and sew the edge and the bottom with a 1/4" seam, pivoting in the corner.
Trim the corners and turn your pillowcase wrong side out. Press the folds of the seams.
Sew a 3/8"or 1/2" seam over the original 1/4" seam, again pivoting in the corner, making sure that you are completely enclosing the original 1/4" seam allowance.
Voila! You're finished! Turn your pillowcase right side out and press!
Wasn't that easy???


