Thursday, August 30, 2012

Thursday Tidbit - Easy Placemats

Do you have messy eaters in your house?  Do you like to dress up your table for special occasions?  Placemats are a quick and easy way to use bits of interesting fabric, protect your table, or turn everyday meals into a festive happening.

We've discovered a new product that makes making placemats a snap using a quilt-as-you-go process - the Placemat Craft Pack by Bosal Products.
 
Each pack contains 4 placemat "forms" made of Craf-Tex Plus Double-Sided Fusible interfacing.  These forms are fusible on both sides, and have the texture and thickness of Timtex or Fast2Fuse.  I made this set of 4 placemats (before binding) using 2-1/2" strips in about an hour and a half.  I ironed (fused) backing fabric to the back of each placemat, and then sewed strips through all layers in a flip and sew, quilt-as-you-go manner from the center out to the edges.  Easy peasy!  The placemats finish at 13"x18".

I like the weight and feel of the finished placemat.  There's a little bit more sturdyness and body than just a quilted placemat.  The placemats are machine washable, but it is suggested that you dry them flat.

We are offering a free Quilt As You Go placemat pattern with the purchase of a Placemat Craft Pack.  The holiday season is approaching, and placemats make a great gift!

Monday, August 27, 2012

One Week, One Thing - August 27

It's the first day of school!!!  Anybody else taking a big breath thinking that there's now more time to sew (except for our teacher friends...sorry)?  I know my last 2 days off have been filled with last minute errands with Audrey and I'm looking forward to having an uninterrupted day this coming Thursday.

All said, I did finish the panel quilt for Quilt Across Texas which begins on Saturday, September 1.
It's nothing major, but it needed to be DONE.  The beauty of this panel is you can trim off the QAT banner at the top and have a great print of Texas with all the counties outlined.  Want one for yourself?  Buy it here!

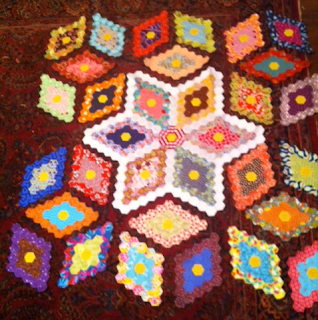
Also, you may have heard me talking (whining) about Audrey's summer art projects that needed to be completed before school.  Her concentration this year is Anatomical Studies using Fabrics and Fibers.  She's been English Paper Piecing a brain scan for the past month, and I've been helping her baste 3/8" hexagons.  Well, I'm proud to say she got it done 3 days before it was due.  If you've ever had an art student in the house, you know this is a big deal!  She really surprised me with her diligence on this project since there are over 600 hexagons in this piece.

I also finished the next sample in my mini EPP quilt series.
 
I started September's Marti & Me club quilt.  It features the Miniature Dresden template and I'm using Tula Pink's "The Birds and The Bees" fabric.  I need to choose a background.....

This week will be spent on the Mini Dresden quilt.  Won't promise you a "finish", but I will promise to make a dent on piecing the remainder of the top.

What did you work on last week?

Friday, August 24, 2012

Batik Bonanza!

 
Our Batik shelves are full and we have more than 80 new bolts coming in the next few weeks, so we are having a Batik Bonanza! Select batiks bolts will be priced at $5-$7 per yard! If you love batiks, here's your chance to stock up on backings and borders!

Come on in and see for yourself, or view the sale bolts online here.

Thursday, August 23, 2012

Thursday Tidbit - The Joy of Fusible Batting

Do you quilt your own quilts, table runners, or wall hangings?  Do you pin or spray baste?  Have you heard of fusible batting?

We carry Hobbs Fusible Batting in 3 sizes:  Crib (45x60), Queent (90x108) and 96" wide by the yard on a roll.  This batting is an iron-on batting made the same way as Hobbs Heirloom Premium 80/20 batting, except it has a fusible resin added in the spray bonding process, on both sides. This resin eliminates the need for pinning or basting,
Here's how it works.   Trim the batting to 4-6" wider than your quilt top. Lay your quilt top centered on the batting and take the whole thing to your ironong board.  Set your iron on cotton (hot) and use steam if possible.  Simply press your quilt top from the center to the outer edges, making sure to keep your iron moving and pressing approximately 3-4 seconds in each area. Use a pressing cloth on the outer edges of the quilt top; you don't want to touch your iron to the batting or you'll be cleaning up a mess!

Once you have ironed the entire surface area of the front of your quilt, center the quilt top/batting sandwich on your backing fabric and repeat the ironing process with the backing fabric right side up on your ironing board.  If any places feel loose, you can repress either the front or the back of the quilt. You can quilt this batting by hand or machine up to 4" apart, and can expect a 3-5% shrinkage rate just like regular Hobbs Heirloom.

There are several reasons why I love this batting.
  • No more crawling on the floor to baste a quilt - using pins that poke me or a basting spray that oversprays or smells.
  • I don't have to stop the quilting process to remove a pin.
  • The "fuse" is NOT a permanent fuse like fusible webbing for applique; if you get a wrinkle, you can peel back your fabric, reposition it, and iron it again.  If the fabric comes loose during the quilting process, just iron it back in place.
  • It doesn't gum up my needle, and the fusbile component washes out.
I think if you try it you will like it.  Brenda is our in-store expert; she uses it all the time on all sizes of quilts and prefers it over any other batting.

There are other fusible batts on the market, and I will admit that I have not tried them.  I cannot vouch for their quality, but I can highly recommend the Hobbs brand.

Tuesday, August 21, 2012

Bonnie Hunter is Coming!!

Bonnie Hunter is coming to visit TQA in January! 


Who is Bonnie Hunter?  Take a visit to her website (www.quiltville.com) and you'll be hooked.  Bonnie is a big believer in the fact that you paid good money for every scrap of fabric in your stash, and she shows you ways to use every available inch!  Her website is chock-full of stash-busting methods and free patterns.

She is also the author of 4 books towards this end:  Adventures in Leaders & Enders, Scraps and Shirttails, Scraps and Shirttails 2, and String Fling.

Bonnie will be joining us on the evening of Thursday, January 3rd at 7pm with her Scrap User's System trunk show and lecture. 
She will discuss her view of the fabric food chain - from large cuts to the tiniest bits and how to organize and use every last bit.  I have attended this lecture before, and even though I have been a fan of her system for years, I was entertained and inspired to make more scrap quilts than ever before!  She will also be available for photographs and book signing after the lecture.  Books will be available for purchase onsite.

The fee for the lecture is $15, and you can pick up a ticket in the store or order online here.

There will be 2 full-day workshops on Friday, January 4 and Saturday, January 5 from 9am-4pm.

Friday's workshop is Virginia Bound.
This quilt is from the book Scraps and Shirttails.  The emphasis in this class is foundation/string piecing.  It's a great quilt for using up the smallest bits of scraps; you can select any color combination you desire or strictly think about it as light and dark and use anything and everything from your scrap stash!  I'm sure there will be plenty of "sharing" going on in class!

The class fee is $60 and you can register in the store, by phone, or online here

Saturday's workship is Bricks in the Barnyard.
This quilt is from the book Scraps and Shirttails II.  You will use pre-cut light and dark squares and bricks, as well as learn the technique for half-square triangles using the Easy Angle ruler.  You'll also learn how to make the braided border.  Again, this quilt is "light" and "dark", or use any color combination of your choice.

The class fee is $60 and you can register in the store, by phone, or online here.

These workshops have limited seating, and I expect them to fill up quickly.  If you want a guaranteed seat, I suggest that you enroll soon.

The lecture and the workshops will be held at First Christian Church of McKinney, 1800 West Hunt Street, in the Discipleship Center which is located behind the sanctuary facing Paula Road.  This is the church behind Brookshire's Grocery, and is 2 blocks north of the quilt shop.

I hope you will join me in welcoming Bonnie to McKinney!


Monday, August 20, 2012

One Week, One Thing - August 20

Have you heard the old adage, "Man plans and God laughs"?  That would be me last week.  I had GRAND sewing plans, but regular life and unwanted interruptions decided to intervene.

My ONE THING for this week was to plan a project using the Quilt Across Texas panel (since this event begins September 1, I needed to do something quick!).  I did get a couple of borders around the panel yesterday afternoon, but I forgot to take a picture of it.  I WILL get it quilted and bound this week!

Most of my spare time (which was usually sometime after 8 or 8:30 pm and completely exhausted) was spent basting 3/8" hexagons for Audrey's art project which is due next Monday.
It wouldn't have been so bad, but she ran out of a color and then changed her mind on some colors, so we ended up doing things over again several times.  I think she may have learned a "planning" lesson on this one!  Since the piece has to be finished this week, I'll be sure to snap a photo of it before it leaves the house.

My plans for this coming week include:  finishing the Quilt Across Texas panel quilt, finishing up my swap blocks due September 1, and starting September's Marti & Me project.  I know I'll get at least ONE of those things done!

Thursday, August 16, 2012

Thursday Tidbit - Sewing with Laminated Cottons

Did you know that we now sell Laminated Cottons?  What are laminated cottons?  They are regular quilt-shop quality fashion prints that have a vinyl coating applied to them.
What are they used for?  They are great for anything that you want to have a mild waterproof element - such as tote bags, cosmetic bags, raincoats, baby bibs, and some even put it on the back of picnic quilts so that the damp ground won't spoil your picnic.  The tote bag you see in the photo is very simple:  1/2 yard of laminated cotton for the outside, 1/2 yard of regular cotton for the inside, and 1 yard of webbing for the handles.  The pattern is The Vinyl and More Bag by Pieced Tree.

Is laminated cotton hard to sew with?  Not really.  There are a few adjustments you'll want to make.  First, you don't want to use pins with laminated cotton.  Once you poke a hole with a pin, it's there forever.  I suggest using Clover Wonder Clips when working with laminates.  You can use a vinyl or teflon foot to prevent sticking, or you can place a piece of transparent tape on the bottom of your sewing foot.  Of course, you'll need to poke or cut out the area where the needle goes through the foot!.

Photo courtesy of www.futuregirl.com
There's also a comprehensive guide to working with laminates by Sew4Home on the web.  You may find it very helpful!
Photo courtesy of www.sew4home.com

The bottom line is that laminated cottons are nothing to be feared!  Enjoy adding a little bit of "shiny" to your next project!

Monday, August 13, 2012

One Week, One Thing - August 13

Well, I accomplished more than I thought I would this past week.

I did quilt and bind the Marti & Me sample for August.

I also finished, quilted and bound my clamshell mini quilt.  This will be offered as a kit/project of the month either late this year or early next year.  There will be 6 quilts in the series.

Quilt Across Texas will kick off September 1 and we received our fabric last week.  I made a set of placemats using a Twice the Charm design roll.  I will offer a free pattern with the purchase of the roll of fabrics.

We also have a zippered pouch swap this week, and here is my offering using Tula Pinks "The Birds & The Bees' fabric.  The box is bigger than I thought it would be, but hopefully somebody will like it!
The front - Fussy Cut English Paper Piecing
The back - Fun squirrels!
I'm also still helping Audrey baste hexagons for her "brain".  She has 2 weeks to get it finished!

This next week I need to figure out what to make with the Quilt Across Texas panel.....

Go For the Gold Winners!

Congratulations to our Go for the Gold winners!

Gold Medal (20% discount for 1 year):      Bonnie Simpson
Silver Medal ($100 TQA gift certificate):  Stephanie Pettus
Bronze Medal ($50 TQA gift certificate):  Susan Roberts

Thanks to everybody who played along with us - it has been a fun two weeks!

Thursday, August 9, 2012

Thursday Tidbit - Using Your Phone as a Design Tool

I hope this is not a "Captain Obvious" post, but did you know that you might be carrying an important design tool in your pocket every day?  I'm talking about your cell phone if it has a camera!

I use the camera on my phone ALL THE TIME when it comes to laying out blocks or entire quilts.  I arrange things like I want them, snap a picture, and then refer to the photo when it comes time to sew things together.

For example, here's my Grandmother's Double Diamond quilt laid out on my living room floor.
As you can see, the photo doesn't have to be pretty - I just used it as a reference for color and block placement.

When laying out a quilt, sometimes you can get better perspective from a photo than you can from looking at the actual blocks.  The smaller scale allows you to see if you have a block turned wrong or if you have a certain color bunched up in one area.

I was at a retreat in May and there was one main design wall.  I was putting a quilt together and used the design wall to arrange my blocks.  Since there were many of us sharing the same space, after I got the arrangement I wanted, I snapped a photo with my phone.  I then took down all my blocks and let someone else use the space.  But I had no fears of getting blocks out of order - I just used my photo for reference at my sewing station!

A photo on your phone is also great for putting blocks or small quilts together, especially if you are travelling.  I worked on the Go and Sew Mini Quilt while travelling to Quilt Market in May.  Here's my hexagons laid out on my lap desk at home.

After I took my picture, I threw all the hexagons in a bag and hit the road.

Here's the finished quilt.  Every hexagon ended up right where I wanted it.
I did the same thing a few weeks ago while on vacation.  The layout:
And the finished mini quilt:
As you can see, I didn't lay out the white pieces.  I knew those would be all the same.  But I wanted to make sure that I got the placement of the colored pieces right.

Isn't it great when you can transform your cell phone into a Pocket Design Wall?

Monday, August 6, 2012

One Week, One Thing - August 6

I can't believe it's August already!  Where has this year gone?

I must admit that I was not as productive this past week as I had wanted, but sometimes you just gotta pull back on "full speed ahead" and take a nap!

I did get the August Marti & Me Club top put together.  It's not quilted yet (my nap yesterday got in the way of that!).
I made some 9-Patches for our block swap here at the shop.  32 down, 64 to go....

I'm pecking away at some projects that I hope to pull together into a program either later this year or early next year.  All of them are mini quilts that are English Paper Pieced.  The first sample is done...
And the second one is underway!

I've taught my daughter how to EPP - she's doing an art project for school using 3/8" hexagons!  I've been a good mom and helped her baste.  Since school starts in 3 weeks (and she needs 3 pieces of art finished by then), I have a feeling I'll be basting some more this coming week.

My goal for this week is to get the Marti & Me top quilted and bound.  I'm sure I'll peck away at some more 9-patches, and who knows what else I'll piddle at.

What one thing are you focused on this week?

Thursday, August 2, 2012

Thursday Tidbit - Standard Bed Sizes

Have you ever found the perfect quilt pattern, selected the perfect fabrics, yet still aren't sure if it will fit the size of your bed?  There's a couple of great booklets available with all kinds of quilter's math in them that include bed charts, but I've found a basic chart on bed sizes to share with you today.


Image Source:  Pacific Star Products
This handy diagram shows actual mattress sizes.  You can click on the link in the caption to print your own copy of this diagram for future reference.

Once you know the mattress size, you can decide how long you want the drop to be (i.e., how much you want it to hang over the sides), or if you want a pillow tuck, etc. to begin determining the finished size of your desired quilt.

Now, you can look at your perfect pattern and know if it will fit your bed!  And if it doesn't, at least you now have a point of reference to figure out how many more blocks and /or borders to add to get it to the correct size.