Showing posts with label Thursday Tidbit. Show all posts

Thursday, August 2, 2012

Thursday Tidbit - Standard Bed Sizes

Have you ever found the perfect quilt pattern, selected the perfect fabrics, yet still aren't sure if it will fit the size of your bed?  There's a couple of great booklets available with all kinds of quilter's math in them that include bed charts, but I've found a basic chart on bed sizes to share with you today.


Image Source:  Pacific Star Products
This handy diagram shows actual mattress sizes.  You can click on the link in the caption to print your own copy of this diagram for future reference.

Once you know the mattress size, you can decide how long you want the drop to be (i.e., how much you want it to hang over the sides), or if you want a pillow tuck, etc. to begin determining the finished size of your desired quilt.

Now, you can look at your perfect pattern and know if it will fit your bed!  And if it doesn't, at least you now have a point of reference to figure out how many more blocks and /or borders to add to get it to the correct size.

Thursday, July 26, 2012

Thursday Tidbit - Swatch Buddies

We found the coolest notions at Quilt Market, and they have finally arrived at the shop!

Have you ever been planning a quilt and need to match fabrics that you already own?  It's often a pain to remember to carry swatches around - I've seen them come into the shop in various forms:  wads of fabrics, baggies of scraps, photo albums with swatches tucked behind plastic pages.

Introducing Swatch Buddies.
These work like a paint fan deck.  Attach your swatch to the 1"x2" plastic card using the included double-sided tape.  There are stickers for the back of the swatch to denote yardage, designer, collection and store where purchased.  You can arrange your swatches by color or project; they come with their own ring holder, and you can peel off the swatch and re-used the card for your next project!

The best thing about these (in my opinion) is that they are small yet organized, and you can actually hold the fabric swatch next to the fabrics you are considering to see if they match.  They are also small and portable - they go where you go!

We carry them in 12 Count, 24 Count, and 48 Count sizes.  Check them out today!

Thursday, July 12, 2012

Thursday Tidbit - Thread Sizing

A couple of weeks ago I discussed sizing of needles.  Today I want to talk about sizing of thread.

The general rule is:  The LARGER the number, the SMALLER (finer) the thread.

And just to be clear in this discussion, I am talking about the types of cotton threads you would find in a general quilting or sewing store.  Large cones of thread used for commercial sewing and general all-purpose threads found in discount stores may or may not adhere to this sizing formula (and most of them contain a polyester component).
Here's a picture I took of a sampling of threads in our store (You may have to click on the picture to get a better view).  On the left is Sulky Blendables in 12 wt.  It's a fairly large thread used for decorative stitching and quilting.

Next to it is Mettler 50wt thread.  This is the weight most used for general sewing and piecing.  We carry Gutermann, Mettler, Star, and Aurifil thread in this size.

To the right of that is Mettler 60wt thread.  It is slightly finer than the 50wt.  I have seen it used for piecing, machine quilting, applique, and hand piecing.  I personally use it for applique and English Paper Piecing, since its finer size makes for smaller stitches in handwork.

Finally, there's YLI Silk 100wt.  This is the smallest thread we carry, and it is used primarily for hand applique.

Floss/Perle Cotton is sized the same way.  The larger the number, the smaller the thread.  Size 5 perle cotton is larger than size 8 or size 12.

One more thing.  I did not include hand quilting thread in this discussion.  It is in a class all its own, and is generally all about the same size.  If a spool is marked "Quilting" or "Hand Quilting", it will usually have a coating on it to make it smoother to pull through all the layers of the quilt sandwich.  NEVER use this thread in your sewing machine!  The coating may rub off inside the machine and gunk up the mechanics.

Thursday, June 28, 2012

Thursday Tidbit - Needle Sizes

I was asked the other day to explain the sizing of needles to a customer.  As I began rattling off information off the top of my head, I realized how confusing sizing can be....hand needle sizing is the EXACT OPPOSITE of sewing machine needle sizing!

Hand Needles
The LARGER the number (size), the SMALLER the needle.

Sewing Machine Needles
The LARGER the number (size), the LARGER the needle.

Confused yet?  I found a couple of great charts created by the Sewing and Craft Alliance in PDF form, ready for you to download and or print out.  Each chart describes types of needles and their respective uses.

For Hand Needles, click here.
For Sewing Machine Needles, click here.

Hope this helps!

Thursday, June 21, 2012

Thursday Tidbit - My Favorite New Fabric Marker

There are all kinds of fabric marking pens, pencils, and tools out there in the marketplace, and I have used many of them over the years.  But I've discovered a new one lately and it is currently my favorite!

I wanted to mark the hand quilting lines on this new mini quilt in the shop.

I knew I needed a marker that I could remove the lines fairly easily when I was finished.  The Sewline Duo Marker  + Eraser Set was just the ticket!
This is a 2 pen set.  The first one you use is the pink one.  It does the actual marking.  It has a tip like a felt-tip pen.
After marking my test lines, I practiced my big stitch quilting.
After quilting for a bit, I then used the white eraser pen.  It has a chiseled tip and you just drag it over the marker lines and they disappear!!  I know it's hard to see in these pics, but if you click on them, you should be able to get a closer look.

This is a great tool if you make a marking mistake.  Just erase it and try again.  I have tested it on several threads (including floss) and the color of the thread remained the same and didn't run.  My daughter found this set and has used it for marking embroidery as well as rough sketching on T-shirts prior to design painting.  I think it's awesome!

Thursday, May 17, 2012

Thursday Tidbit - How a Sewing Machine Works

Last week I talked about how important it is to perform simple maintenance on your sewing machine on a regular basis to keep it in top shape and running smooth.

But do you know how a sewing machine actually works?  I found this great video (from The Science Channel, of all places!) that explains the basics.


Pretty cool, huh?  Here's a link to an animated graphic that really shows how the needle and the hook work together.

There are three things I'd like to emphasize with this video.
  1. With a mechanism moving 14 times per second, it's imperative that you keep the bobbin case/race area clean of lint.  Severe lint buildup will interfere with the needle/hook interchange and prevent you from getting a nice, clean stitch.
  2. If you break a needle, make sure you check/clean your bobbin case carefully to remove any broken needle bits.  You don't want them to fall into your bobbin assembly.
  3. If you run over a pin at a fast enough speed, you can actually push the metal of the pin into the hook mechanism with the needle and knock it out of "time".  The needle will no longer be perfectly synchronized with the hook and you won't be able to pick up any stitches.  You're dead in the water.  Don't ask me how I know this.  And don't ask me how many times I've needed to learn this lesson.  The remedy for this is a visit to the sewing machine hospital and around $100.  The only upside to knocking your machine out of time is it forces you to go ahead and get that professional tune-up that you should be doing once a year.
I hope you find this information helpful, and give your sewing machine a big hug for working so hard for you!

Thursday, May 10, 2012

Thursday Tidbit - Sewing Machine Maintenance

Question:  How often do you change your sewing machine needle?
Answer:    "When it breaks" is not an acceptable answer!

Did you know that you should change your needle every 4-8 hours of sewing?  How often do you oil it?  What about cleaning out the thread lint?

There is a fabulous article from Threads Magazine that will walk you through basic preventive maintenance for your sewing machine.  Your sewing machine is your number one tool for sewing and quilting, and getting into the habit of a little TLC will keep it running in good shape for many years.


Thursday, May 3, 2012

Thursday Tidbit - Fusible Applique Hint

If you are using a fusible web product for applique (such as Wonder Under, Steam-A-Seam, etc.), you have to peel the paper off the back before fusing the shape onto a background.  Sometimes getting that paper off can be a challenge!  This hint works with ANY fusible product that has a paper backing.

You don't want to attempt to peel the paper off from the edge of the shape.  Usually this will only frustrate you and you will end up fraying the edges of your shape.  That's not pretty!

Pick up your shape and score the paper backing with a pin.  I am using a leaf shape for this example.

Make the score big enough so that you can grab the paper from the center of the shape.

Pull off the paper from the center to the edge.
When you get to the edge of the shape, if you can continue peeling the remainder of the paper in one step, go ahead and do that.  If the piece you are peeling to the edge tears completely off the shape, grab a second edge of the backing paper (away from the edge) and peel the rest of it off.  The trick is to peel from the center toward the edges, thus minimizing fraying.
Here's the leaf (from the backside) with the paper removed, showing the fusible.
Here's the leaf from the right side. There's just a few tiny threads that need to be clipped off, but no major fraying of the shape.

You are now able to iron the applique on your background and stitch it down however you'd like!

Thursday, April 26, 2012

Thursday Tidbit - Checking Your 1/4" Seam

All quilting patterns are written to be sewn using a 1/4" seam allowance.  Most machines have a 1/4" foot that can be purchased for them.  But, not all 1/4" feet are created equal. If you are having difficulties making all your piecing line up, you should double-check the accuracy of your foot.  Most of the troubleshooting we do in the shop for customers regarding patchwork issues has to do with an inaccurate 1/4" seam.

We have a little tool that will help you with that.  It's the Perkins Perfect Piecing Seam Guide.


Here's what the actual guide looks like.
See that little hole in the middle of the etched line at the bottom?  That's for the placement of your needle.

Slip the guide under your foot and gently lower your needle into the hole.  Make sure the guide is straight and lower your foot onto the guide.
The right edge of your 1/4" foot should be flush with the right edge of the tool.  If it's not, your seaming is going to be off, and you will have much greater difficulty getting your patchwork seams and points to match up.  You can be cutting everything out accurately, but if your seam is not at 1/4", your blocks will not come out the right size.  Being off by as little as 1/32nd of an inch per seam can make your entire quilt top shorter or long by INCHES once you multiply all your seams in the quilt top.  Piecing with an accurate 1/4" seam will make your quilting life so much more enjoyable!

So, what if your foot doesn't line up with your seam guide?  If you have the ability to move your needle position, do so until everything lines up.  WRITE DOWN THIS CHANGE SO THAT YOU DON'T FORGET!  (Yes, I'm yelling.  It's that important).  If you can't change the needle position, you can make your own "jig" for your 1/4" seam.  You can purchase adhesive-backed moleskin in the foot care department of your pharmacy and cut a piece off and place it next to the seam guide.  When the seam guide is removed, you will have a little "fence" to place your patches up next to.  Or, in a pinch, you can grab a stack of post-it notes and do the same thing.  You want to position your "jig" as close to the foot as you can, making sure not to touch the feed dogs on the throatplate of your machine.
The post-its are not as sticky as the moleskin, and they will move over time.  But they work in a pinch.  If you are new to quilting, and your 1/4" foot is accurate but you are still having trouble sewing straight and staying consistent with your seam allowances, you can also use the moleskin or post-it note jig as "training wheels" until you feel confident using just the foot by itself.

After you have checked your foot, now it's time to check your real seam allowances.  Cut (3) pieces of fabric 1-1/2" wide.  I cut mine 1-1/2" x 3-1/2".

Sew the 3 pieces together to create a mini rail fence block.  Press the seams open or to the side and measure the width of the block.  It should measure 3-1/2" wide.  If it doesn't, re-check your foot, measure your actual seams, review your pressing and try again.

By ensuring that you are piecing with an accurate 1/4" seam, you are well on your way to perfect patchwork!

Thursday, April 19, 2012

Thursday Tidbit - Grainlines

Here's some basic info for you.

Fabric is woven with fibers, and the direction of the fibers is called the "grainline".
  • The fibers that run parallel to the selvage are the "weft", or quilters call it the Length of Grain.  These are the strongest fibers in the material, and they have little to no stretch or give.
  • The fibers that run from selvage to selvage are the "warp", or Cross Grain.  These are the weakest fibers in the material, and they have a small amount of stretch or give.
  • A diagonal cut across the warp & the weft is called Bias, and it has the most stretch of all.

Why should you care?
1.  Marti Michell is a self-described "grainline geek".  Since the length of grain has little to no stretch, she cuts all of her pieces on length of grain so that her project is guaranteed to be nice and flat.  If you cut your borders on the length of grain, you won't have to seam them for length.  Con:  Since there is no give, your piecing needs to be deadly accurate.  There's no "easing" allowed.  Using length of grain for piecing and borders also requires that you purchase more fabric.
2.  Pieces cut cross grain have a little bit of stretch.  If your piecing tends not to be 100% accurate, you can "ease" blocks to sashing and borders.  You will require less fabric if you cut all your pieces cross grain, but any sash or border longer than 42" will have to be seamed.
3.  Bias is extremely flexible, and is required if you have curves or other attributes that require the fabric to bend.  Of course, the diagonal seam in a half square is on the bias.  This is why you need to use caution when ironing half squares or any other piecing that has an angle in it (like flying geese).  "Ironing" instead of "pressing" along a bias-pieced seam can cause distortion in the block.  But cutting on the bias is very handy for applique or for binding a quilt with curved edges.
4.  Tearing fabric is easier if you tear along the length of grain rather than the cross grain.  Think about it; by tearing on the length of grain, you are breaking the weaker (warp) fibers.  You have a minimum of damage or bruising.  This is why I tear my selvages off when piecing my backing. If you tear across the grain (from selvage to selvage), you are attempting to break the strongest (weft) fibers, and the resulting damage (or "bruising") to the remaining fabric can equal a half inch or more.  This is why we rotary cut our fabric in the store instead of tearing it.  Some quilt shops still tear fabric from the bolt.  If you ever encounter this, you can ask to have your fabric cut, and if they won't, I suggest that you purchase extra fabric to allow for the "bruising" that will result.

Even if you don't have the selvage on a piece of fabric anymore, you can use the stretch test to determine the grainline of a piece of fabric.  Go ahead, give it a try!

Thursday, April 12, 2012

Thursday Tidbit - Piecing Your Backing

Congratulations! You've finished a fabulous quilt top and now it's time to piece your backing together.  If you've forgotten how to determine how much yardage you will need, refresh your memory by reading the past Tidbit on calculating yardage.

Most of your backings (unless you are making a queen-sized or larger quilt) will require a single seam in the backing.  Here's the quick way I go about preparing and sewing that seam.

You know you'll have to cut your yardage in half.  Don't try to measure it; just fold it in half and place a pin in the fold.
Open up the yardage, and place a ruler next to the pin, making sure your ruler is aligned straight with the fold.
Remove the pin and cut from the fold to the selvage.  You now have two equal pieces for your backing.

The next step is to sew the two halves together along the long sides.  You'll need to remove the selvages before you begin sewing this seam.  But before you do that, here's something to think about.

If your backing is directional, you'll want to make sure that the two halves are facing the same direction once you sew the seam.  Without wrangling yards of fabric, here's an easy way to make sure that both pieces are oriented the same way.

Have you ever really looked at selvages on fabric?  Usually, one selvage has printed information on it, and the other one doesn't.  If you remove the printed selvage from one half of backing and the plain selvage from the other, you are guaranteed that your print will be in the same direction once your seam is sewn.  Of course, the exception is batiks, woven plaids and solids.  You'll just have to pay attention to your pattern orientation on those.
Once you've determined which selvages you are going to remove, it's time to do that.  Instead of opening up the fabric and folding it multiple times and cutting off the selvage with a rotary cutter and ruler, I TEAR the selvage off.  Yes, I said TEAR.  You can never guarantee that your cut is going to be straight if you make multiple folds in yards of fabric and try to cut it.  Tearing guarantees a straight edge, because you are tearing along the length of grain of the fabric.  I know this sounds scary, but you'll just have to trust me on this.  I've done it hundreds of times!

Make a snip with a pair of scissors parallel to the selvage.
Now pull on the selvage and start tearing!  The fabric will curl slightly after being torn.
Take the fabric to your ironing board and press the edge as well as press out the center fold line.
This is how your edge will look after it's pressed.  You may have just a little bit of "bruising" of the fabric, but not nearly as much as you would if you had torn the fabric cross-grain (from selvage to selvage).

Place your two halves right sides together, and sew them together using a 1/2" seam.  (Note:  If you don't use pins, you will probably end up with one edge being 1/2" longer than the other when you get to the end of the seam.  Don't panic - it's okay because you added extra to the length or width when you calculated your yardage amount.  This just emphasizes the fact that fabric feeds at different rates through the feeds dogs.  This is why you NEVER should sew on borders without pinning!) Press the seam open and you're good to go!

If you are piecing a back with 3 seams, you will have to measure your yardage into thirds before you cut it.  Work with the selvages the same way; remove the selvages from piece 1 and piece 2 and seam together.  Press the seam.  Now, remove the selvages from the other side of piece 2 and piece 3 and seam together.  By doing the sewing in steps, you'll guarantee that the print on all 3 panels is oriented in the same direction.

Sunday, April 1, 2012

Thursday Tidbit - Using the Angler 2

I am currently working on a sample for the store using this pattern
and this fabric.
The basic block calls for what I call "connector corners" or "flip and sew corners" - where you lay a square across a block and sew the diagonal, trim the corner, and flip the remaining triangle up...like this.
There are 42 blocks in this quilt (using the entire layer cake), and each block calls for 8 connector corners.  The pattern says to draw a diagonal sewing line across each square.  I quickly did the math...  42 blocks times 8 corners equals 336 lines!  I don't know about you, but that would take me a lot of time!  I much rather be sewing than marking lines!

The Angler 2 Tool to my rescue!!

This handy-dandy plastic template sits over the throatplate of your sewing machine and you can use the lines on the tool as a fabric guide instead of actually marking lines.  Here's how it works.

Inside the package is a plastic template.  The template is made up of a "key" and its surround.
You have to cut the "key" away from the surround on the dotted lines as instructed.  Here's a closeup of the "key".
See that little circle that says "Punch needle hole here"?  Place the key under your presser foot, and lower the needle directly into that hole.

Make sure your "key" template is sitting straight on the throatplate and lower the presser foot to hold it in place, making sure the needle is still in the down position in the hole.

Now, take the template "surround" that you cut away from the "key" and place it on the bed of your machine, snugging it right up to the cut lines of the "key" template.
Tape the "surround" to the bed of your machine.  I would usually use painter's or masking tape for this, but I have a teenager in the house who "borrows" things and all I could find was scotch tape!  Can you see how the lines of the "surround" completely match up to the lines on the "key"? 

After the "surround" template is secured to your machine, raise the presser foot and the needle and remove the "key" template.
Place the "key" template back in the package!  You must make sure not to lose this piece!  You will need it every time that you attach the Angler to your machine!  In fact, I put all of the parts into a larger ziploc bag so that nothing gets misplaced.

Now you are ready to sew those pesky diagonal lines!

Place your square on the corner of the fabric or block that you are attaching it to, matching up corners and sides.  You can pin the square in place if you wish.  Place the square in front of the needle, matching the top corner with the needle line, and the bottom corner with the center line on the tool.
Begin sewing, keeping the bottom corner lined up with the center line on the template.
Continue sewing across the square, and "eyeball" the last bit to the corner once your square moves off the template.
You can chain piece as many corners as you need to.  Just pick up the next one, line it up in front of the needle, align the bottom corner with the template line, and sew!
It's that easy!  Nice, straight diagonal lines with no marking!

If you look closely at the template, there are lines 1/4" on either side of the center line.  You can use these lines if you are making half squares and sewing on both sides of diagonal.

The tool comes with complete printed directions.  It's a life saver for this type of task!

The quilt is all finished now - isn't it cute?  You can get one for yourself here.

Tuesday, March 27, 2012

Thursday Tidbit - Buying a Sewing Machine

Aaaah, sewing machines.  A good machine can be your best friend for life, and a bad one can make you want to give up sewing all together!  It's quite possible that you could have a longer relationship with your sewing machine than you do with some of the people in your life.  Having a good sewing machine is that important!

If you are new to sewing, you may not realize there's a difference between a good machine and a bad machine.  And if you borrowed your mother's cousin's aunt's dead grandmother's sewing machine or bought one at a Big Box retailer for under $100 to see if you like this sewing and quilting thing, you may not know much about sewing machines at all.

Sewing machines come in all shapes, sizes and price ranges.  I completely understand the budgetary need to start out with a borrowed, second-hand, or discount machine.  We've all had to start somewhere.  But I'll tell you, a good and dependable sewing machine with a smooth stitch and great tension can make all the difference in the world in the outcome of your project.  Many students in our classes become frustrated with a project and they don't understand that it's not their fault - they just have a cruddy sewing machine making things difficult.

The age of the machine doesn't matter - you don't have to go all bright, shiny and new to have a good machine.  If you've inherited a machine or purchased one second-hand, the best gift you can give yourself is to take it to a reputable machine dealer and have it serviced.  It will probably cost you around $100, but it could be the best $100 you ever spent.  Nobody wants to spend their well-earned sewing time jacking around with a persnickety sewing machine!  Save yourself a headache!

Theoretically, to piece a quilt, all your machine has to have is a nice, even, straight stitch.  I know several quilters that piece masterpieces using 70 year old Singer machines.  But, as time goes by, you may want to try machine quilting, or zig zag stitching or making handbags, and want a machine that does a little bit more.  Or, perhaps you started with a Big Box machine and it doesn't work so well any more (and never really did....) and you're in the market for a better quality machine.  How on earth do you go about choosing the right sewing machine for you? 

Sewing machines are like cars or religion.  There's all kinds, and sewists tend to be very brand loyal.  But the things that someone loves about their machine may not make any difference to you, so their recommendation has only so much merit.  You really have to think about the features you want and take multiple test drives.   There are lots of choices in the marketplace, and you can be completely overwhelmed if you go to the store without a checklist.  Some sewing machine dealers are like used car salesmen and will try to get you into the most expensive machine.  Some are really great.  Some may be educated about sewing for quilts as opposed to sewing garments or home dec, while others don't really understand the difference.  Going on visits armed with basic knowledge gives you a leg up and will help you make a better informed choice.  Take a deep breath, and I'll walk you through some of basic questions you should ask yourself, your friends or a dealer when you visit a sewing machine store.
Here's some of the first steps you should do and know before test driving a new machine.

1.  Go ahead and ask your friends what kind of machines they have.  Ask them what they like best about them and what they like the least.  Remember that you may be getting a biased opinion, but you will be getting an opinion!  Besides the brand, ask them WHERE they purchased their machine and if they are happy with the dealership.  Buying a great machine from a dealer with poor customer service can be a major headache.

2.  Make a list of sewing machine dealers in your area.  You want to purchase a machine locally from someone who is convenient to you because the store where you purchase your machine is the ONLY place you can receive lessons and warranty service.   You will not receive lessons or warrantied repairs from a local dealer if you purchase a machine on the internet or at a quilt show far from home. You think you're getting a great deal, but you're not.  You're missing the SERVICE portion of the deal.  After the warranty period on a new sewing machine has expired (usually one year), you can take it anywhere you'd like to have tune-ups and repairs made.

3.  Know that there are 3 kinds of machines out there:  mechanical, electronic, and computerized.  
  • Mechanical machines are gear driven and don't have computer chips.  They are workhorse machines and have a limited number of stitches and features.  You manually have to turn a dial or push a button to change stitches, and you may be limited to the sizes of stitches built into the machine.  They are usually priced at the lower end of the spectrum, and the heavier they are, the better the parts are.  Plastic is lighter than metal.  Just sayin'.  Mechanical machines are not a bad thing; they're just basic, entry-level machines.
  • Electronic machines have computer chips and boards in them.  They offer a wider range of stitch styles and sizes, and have features not offered on a mechanical machine.  They range in price from a couple of hundred dollars up to a several thousand.  The majority of the machines you will be looking at will be electronic.
  • Computerized machines are also electronic, but they have the capability to be programmed to perform a task without guidance.  Machines with embroidery capabilities tend to fall in this category, and pricing usually starts in the thousands.  This is probably not the category you will be looking at for your first machine.
4.  Sewing machine brands have become very intertwined over the last 10 to 15 years.  Back in the day, Singer made Singers, Pfaff made Pfaffs, Viking made Vikings, etc.  Nowadays, many of the well know brands have been bought out and are owned by a different parent company.  For instance, Singer made Kenmores for a while, but that partnership ended in 2011.  Viking owns Pfaff and Janome owns Elna.  Confused yet?  Ask the dealer who "makes" the machine your are looking at, and ask WHERE it was made.  You may look at very similar machines with two different brand names, but they really are the same on the inside because they are designed and made by the same parent company.  And just like any other consumer product on the market, one of them may cost more because of the brand name.  Don't pay extra for a "name" if the company made a similar machine for a different brand.  Also, just because the salesman tells you that a machine has German or Swiss engineering, doesn't mean it was made there (like it would have been in the past).  The machines you are looking at are probably being made in China, Japan, or Taiwan.  Very inexpensive machines made in China are going to be of the quality you would expect - Chinese cheap.  Taiwanese and Japanese fabrication is more reliable.  Remember, the heavier a machine is, the less plastic parts are inside.  Plastic wears out sooner, metal doesn't.  If you have a choice narrowed down between two machines, pick them up and compare the weight.

5.  Think about the features you'd like your machine to have.  Here are a few to consider.
  • Needle Up/Down - This is an electronic feature that determines the placement of the needle when the machine stops running.  Needle Down is really handy when you stop to reposition your fabric or to pivot.
  • Needle Threader -  This gizmo is just like it sounds; it aids in threading the needle.  It's a wonderful tool for those of us with older eyes!
  • Speed Control - Do you want the ability to adjust your sewing speed?
  • Free Arm - If you think you might ever wish to sew clothing or handbags, you might like a Free Arm feature.
  • Size of the Harp - the what?  The harp is the opening of the space between the needle arm and the motor.  A larger space makes machine quilting and sewing large bulky things easier.
  • Feet - You are definitely going to need a 1/4" foot, and most likely a walking and/or darning foot if you're going to do any kind of machine quilting.  Ask if these feet are included, and if not, how much additional cost is involved.
  • Additional accessories - Extension tables and carrying cases or covers fall in this category. Are they included, and if not, how much extra cost is involved?
6.  Determine your budget.  Nothing is worse than falling head over heels for a machine that costs more than you are willing to spend, or overspending and then having buyer's remorse.  You'll end up being dissatisfied with whatever you choose and that's no fun.  But, I will encourage you to purchase the best machine that you can readily afford.

Now it's time to test drive.  Make sure you allow yourself enough time to properly test out machines; 10 or 15 minutes is not enough time to make a decision that could last for years!  Go to the dealer armed with real quilting fabrics.  Most dealerships have scraps to sew on, but they are NOT quilt-weight cottons.  I advise you to take pre-cut squares and strips.  Ask to test drive with a 1/4" foot.  Chain sew several pieces in a row to see how well the 1/4" foot feeds.  Believe me when I tell you that not all 1/4" feet sit properly on the feed dogs!  Take a small ruler with you and actually measure the quarter inch seam.  If you already machine quilt, take a quilt sandwich with you and test that out also.  If there are any other features that you are interested in, take the time to try them all out thoroughly.

Ask the dealer specifically about machine training (if you think you'll need it), warranties, and trade-in/trade-up programs offered.  Ask what the typical service turn-around time is.  You are interviewing the dealership itself for services as well as looking for the right machine for your needs. Hopefully, with a little bit of time and planning, you will soon own the machine of your dreams!

Buying a sewing machine doesn't have to be a scary process.  Do your research, take some time, and consider carefully.  Fall in love with your choice.  Hopefully, the two of you will have a long and productive relationship for years to come!

Thursday, March 22, 2012

Thursday Tidbit - Math For Quilters, Part 4

In this last installment of Math for Quilters, I'll show you how to figure out yardage for your quilt back and for binding.

BACKING:  There are many charts for calculating backing available in quilting resource books; however, I will give you my rule of thumb.

If the longest side of your quilt is 80" or less, you can piece your quilt back with a horizontal seam.
  • Add 6" to the width of your quilt top.
  • Multiply this number x 2 = Linear Inches Needed
  • Linear Inches Needed / 36" = Total Yardage Required
Cut the fabric in half cross-wise (selvedge to selvedge), remove the selvedges from the seam sides, then sew the two pieces together lengthwise (along the long edges).

If your quilt top is longer than 80", but no wider than 80", you can piece your quilt back with a vertical seam.
  • Add 6" to the length of your quilt top.
  • Multiply this number x 2 = Linear Inches Needed
  • Linear Inches Needed / 36" = Total Yardage Required
Cut the fabric in half cross-wise (selvedge to selvedge), remove the selvedges from the seam sides, then sew the two pieces together lengthwise (along the long edges).

If both the length and width of your quilt top is greater than 80", you will need to piece your back with 3 panels.

  • Add 6" to the width of your quilt top.
  • Multiply this number x 3 = Linear Inches Needed
  • Linear Inches Needed / 36" = Total Yardage Required
Cut the fabric in thirds cross-wise (selvedge to selvedge), remove the selvedges from the seam sides, then sew the three pieces together lengthwise (along the long edges).

BINDING:  The formula for calculating binding is a simple 4-step process, but you do need to decide how wide you wish to cut your binding before doing the math.  This is the calculation for cross-grain (WOF) binding.  If you want to make bias binding, I suggest you purchase 1 yard to minimize the number of seams required to piece your binding.

1.  (Length + Width of Quilt) x 2 = # Linear Inches of Binding Required
2.  # Linear Inches of Binding Required / 40" usable WOF = # Strips Needed
3.  # Strips Needed x Binding Width = # Linear Inches of Fabric Needed
4.  # Linear Inches of Fabric Needed / 36" per yard = Yardage Needed (rounded up)

For example, if I have a quilt that is 72" x 80", and I cut my binding 2-1/4" wide, here are the steps I would follow:
  • (72" + 80") x 2 = 304" of linear binding required
  • 304" / 40" = 7.6 strips needed (rounded up to 8)  If your calculation is very close to being a whole number before rounding up (like 5.8 or 6.9), I recommend adding one more strip to your count.  I'd rather have too much binding than not enough!
  • 8 strips x 2-1/4" wide = 18" of fabric needed
  • 18" of fabric needed / 36" per yard = 1/2 yard of fabric
I would then buy the next increment of yardage (5/8 yard) to allow for squaring up the fabric, etc.

I hope you have learned something from these last 4 posts.  I know it's a lot of information, but it's kind of like undergarments.  You need a good foundation for the the rest of it to look good!

Next week:  Buying a Sewing Machine!

Wednesday, March 14, 2012

Thursday Tidbit - Math for Quilters, Part 3

Are ya'll still with me on this math thing?  Has your head exploded yet?  Are things, heaven forbid, starting to actually make sense to you?  I hope so!  It's a little bit harder doing this online (in a one-way conversation) instead of face to face, and I appreciate you hanging in there.  Again, if there's something that's not making sense, just leave a comment and I'll try to answer as best I can.

Let's review what we've covered so far:  determining the underlying grid base of blocks, resizing blocks by changing a grid unit size, calculating sizes of finished quilts by deciding on block, sashing and border sizes, and determining the number and sizes of blocks, sashes, and borders we need to cut to finish our quilt.

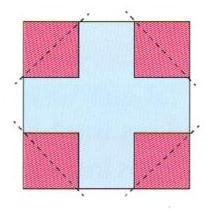
Here's a graphic of our sample quilt, along with the chart we made up of how many of each part we need as well as the cut sizes of each part.
Quilt Size:  50" x 63" Finished

If you were making the quilt in this example, it's time to raid your stash or go to the quilt shop for yardage for each component to set the quilt blocks together.  I'm assuming the (12) 12" finished blocks are already made - we're just working on setting the blocks together.  There are tons of reference books and online tutorials for making quilt blocks, so I'm not getting into that here. This is more on how to actually put a grouping of blocks together into a quilt.

How much linear (or cut) yardage for each setting component do you need?  You really need to know these figures, or you'll run short, and we all know how frustrating that can be!

Helpful Hint:  Although today's fabric is manufactured to be 44"/45" wide, you should only count on 40" of usable width when calculating necessary yardage due to varying selvedge sizes, etc.  When working with fat quarters, use 20" as your guide for width.  A linear yard of fabric measures 36" long.

Sashing:  We know we need 17 pieces cut 1-1/2" x 12-1/2" by using the chart above.  We can either cut our strips 1-1/2" across the width of the fabric (WOF) or 12-1/2" WOF.  Which way is the most efficient use of fabric?
 
If we cut one strip of fabric at 1-1/2" by width of fabric (WOF), how many pieces at 12-1/2" can we subcut?
WOF / subcutting measurement = #pieces
  40" / 12.5" =3.2
We can get 3 sashing pieces from a 1-1/2" by WOF strip. 

How many strips at 1-1/2" each would we need to cut to get 17 sashing pieces?
Qty of Pieces Needed / # Pieces per Strip = # Strips Needed
17 pieces total / 3 per strip = 5.6 strips
We can get 17 sashing pieces from (6) 1-1/2" x WOF strips.

How many linear inches of fabric would we need if we cut our sashing using 1-1/2" x WOF strips?
Total # Strips Needed x Width of Cut Strip = Linear Inches of Fabric Required
6 strips x 1-1/2"  wide = 9" Linear inches of fabric (1/4 yard)
I would purchase 1/3 yard (12") so that I was sure that I had room to square up the fabric.  If using fabric from my stash, I would make sure I had at least 10" on hand.

How many sashing pieces can we cut from one 12-1/2" x WOF strip?
WOF / subcutting measurement = # pieces
40" wide / 1-1/2" subcut =26.6 sashing strips

So, one cut of 12-1/2" across the width of the fabric will yield more than enough sashing strips if we subcut at 1-1/2" wide.  But, how much yardage would you need to buy for a 12-1/2" cut?
Linear inches needed / 36" per yard = yardage required
12-1/2" / 36" =.347 yard
This rounds up to 3/8 (.375) yards or 13-1/2".

Now we know that we will need less fabric (1/4 yard) if we cut (6) strips 1-1/2" wide than if we cut (1) 12-1/2" wide strip (3/8 yard).

I suggest that you use these calculations (both ways) any time you need to cut rectangles to determine the most efficient use of fabric.

POSTS (or CORNERSTONES):  According to the chart, we need 6 squares cut 1-1/2" x 1-1/2".  We can probably use scraps for these, or purchase the smallest amount sold by the quilt shop (an 1/8th yard or a fat quarter).

INNER BORDERS:   If you are going to cut your borders length of grain (parallel to the selvedge), you would need to buy yardage a couple of inches longer than your longest border to allow for shrinkage or squaring up.

Here is the calculation for determining cross-cut (or pieced) borders.

We need (2) inner borders for the sides of our quilt cut at 1-1/2" x 51-1/2" and (2) borders for the top and bottom cut at 1-1/2" x 40-1/2".  We also know we need to cut the strips at 1-1/2" x WOF.

How many strips do we need to cut for the side borders?
If the border measurement is greater than 40", you will need to piece your border strips.
(Border Length x 2) / 40" usable width of fabric = Number of Strips Needed
(51-1/2" x 2) / 40" = 2.575       (3 strips of fabric are needed for side borders)

How many strips do we need to cut for the top and bottom borders?
If the border measurement is roughly 40" or less, you can get one border cut from each strip.
(2) 40-1/2" borders = 2 strips of fabric needed for top & bottom borders

Total number of Inner Border Strips:  (3) for sides + (2) for top and bottom = 5 Strips cut 1-1/2" x WOF

**IMPORTANT!!!!  If you are going to JOIN your border strips (for length) using a bias/diagonal seam, you need to allow additional inches for that!  You will lose inches in length by seaming this way.  I recommend purchasing extra fabric for an additional strip to accommodate the diagonal seam.

Yardage for Inner Borders:
# Strips Needed x Width of Cut Strip = Linear Inches of Fabric Needed
5 Strips x 1-1/2" wide = 7-1/2" Inches

7-1/2" / 36 inches per yard = .208 yards (Round up to 1/4 or .25 yards)

OUTER BORDERS:  The process is exactly the same as the inner borders.
Border Measurements:
    Side Borders:                              (2) 5-1/2" x 53-1/2"
    Top/Bottom Borders:                  (2) 5-1/2" x 50-1/2"

Number of strips needed for side borders (use the formula above):
(53-1/2" x 2) / 40" wide = 2.675 strips    (Round up to 3 strips)

Number of strips needed for top and bottom borders:
(50-1/2" x 2) / 40" wide = 2.525 strips     (Round up to 3 strips)

Total number of Outer Border Strips Needed:  6  (3 + 3)

Linear Inches of Fabric Required for Outer Borders:
6 Strips x 5-1/2" wide - 33 Inches

Yardage Required:
33" Needed / 36" Inches per Yard = .916   (Round up to 1 yard)

Wow.  That was a lot for one post.  I hope you stuck with me up to this point.  I hope you are not too overwhelmed; just think about each step as you go through the process, and it will all begin to make sense.  If it doesn't, just holler!  I'll do my best to clarify it for you!

Next Week:  Figuring yardage for Backing and Binding!